
The objective of this Quick-Start Guide is to get you started quickly to benefit from your subscription to SureFiz®. For in depth details on how to interact with SureFiz® and how SureFiz interacts with you, please visit https://www.surefiz.com/HowTo.
Please follow the steps in the following order:
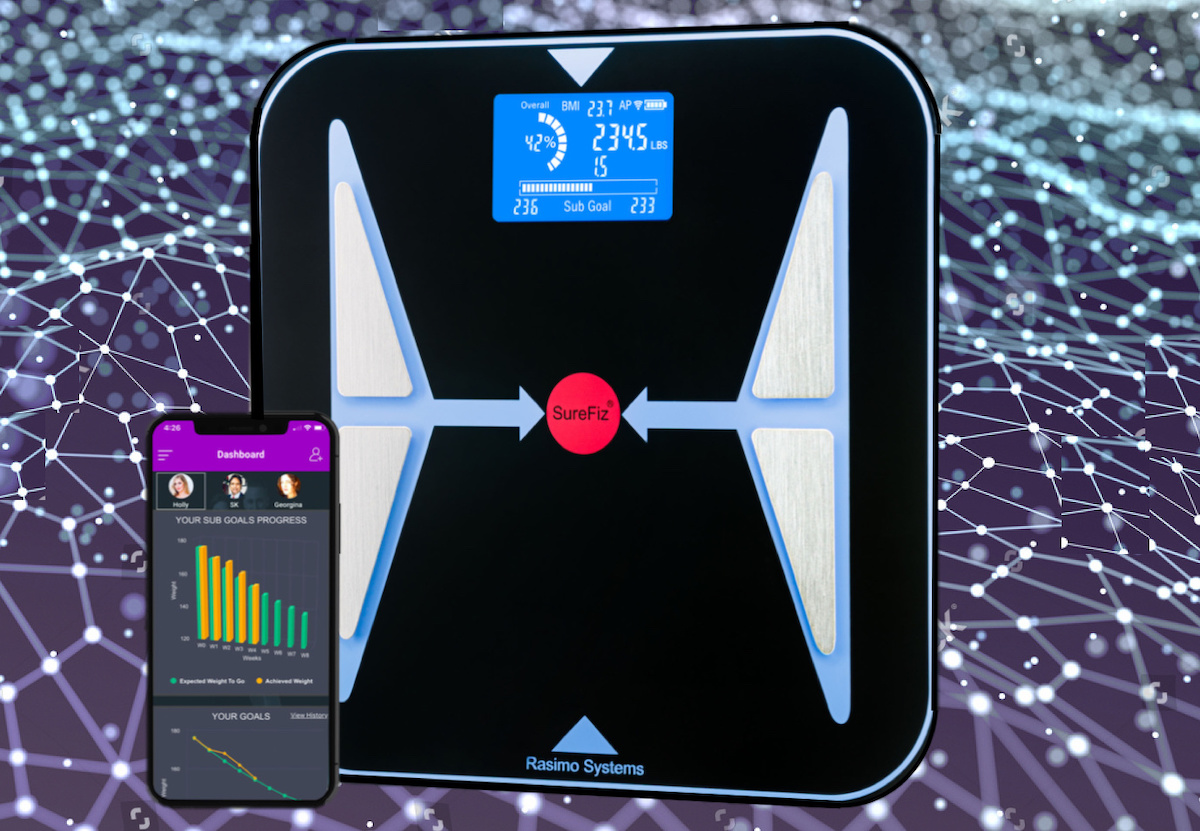
Once you have completed the above steps, all you have to do is step on the scale regularly, SureFiz® will care of the rest.
If you have QR scanner on your smart device, please scan the Google Play Store QR code below for Android devices or scan the Apple App Store QR code below for your Apple smart device.
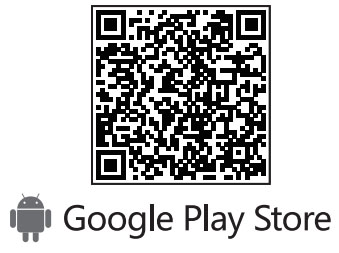
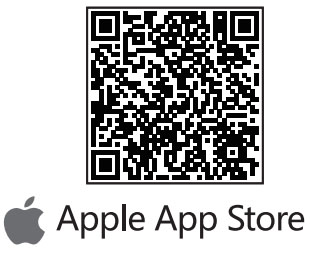
If you don't have QR scanner installed on your phone, you can install QR code and scan the aforementioned QR codes to download SureFiz® App. Alternatively you can tap on Apple App Store icon ![]() or Google Play Store icon
or Google Play Store icon ![]() on your phone and search for 'SureFiz', and download SureFiz® App.
on your phone and search for 'SureFiz', and download SureFiz® App. ![]() Please make sure you "Allow" SureFiz® to send notifications. This is extremely important.
Please make sure you "Allow" SureFiz® to send notifications. This is extremely important.
Place the scale on a hard and flat surface and within your 2.4G WiFi network coverage are. Placing the scale on uneven or soft place (on a carpet for example) will not determine your weight accurately.
DO NOT INSTALL THE BATTERIES YET. On the back of the scale, on a label, look for Scale ID; it is a 10-digit long number.

Please note this number, you will need it later in this step.
Through phone Settings connect your smart phone to the WiFi network to which you want to connect your scale. Please note the WiFi must be 2.4 GHz WiFi, it should NOT be 5 GHz WiFi. If you have only one WiFi network showing in the list of available WiFi that belongs to you and your phone is already connected to that WiFi you are all set (For example, Fig. WiFi Settings shows two WiFi).
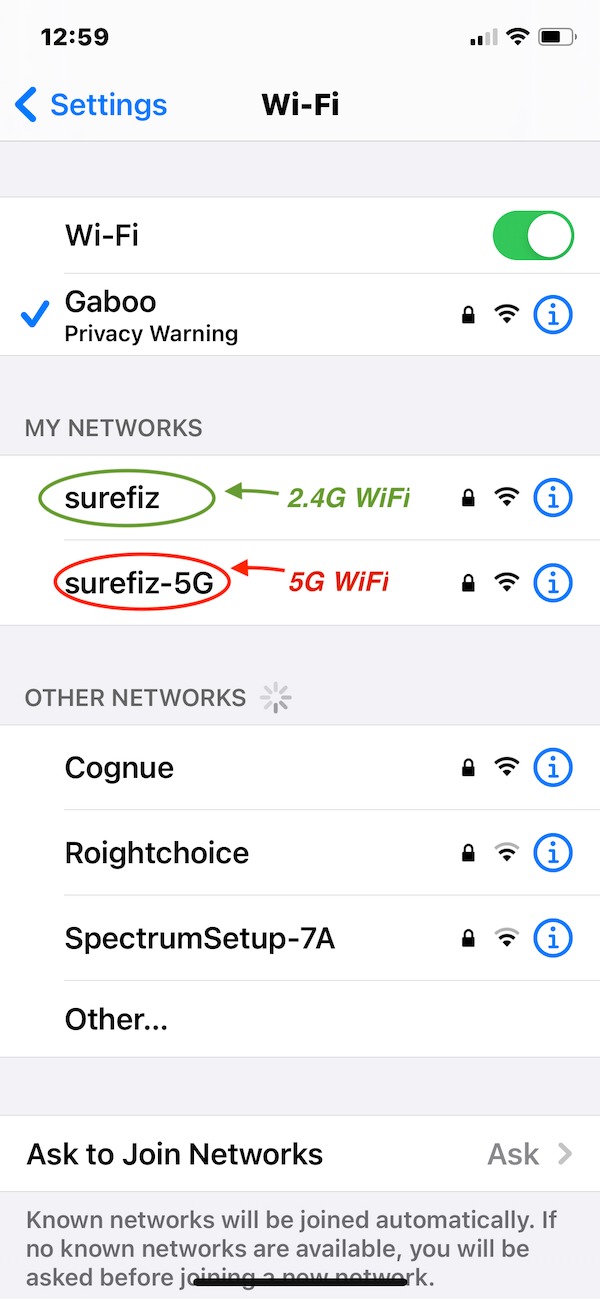
Fig. WiFi Settings
1. When you launch your SureFiz app for the first time, the app will prompt you if you’d like SureFiz to send you notifications. Tap allow so you can keep on track! (Fig. 1)
2. To start the process, tap on “Login” and then follow the step-by-step instructions on the screen. (Fig. 2)
3. Login in to the SureFiz® App using your email address and password you used during sign up. (Fig. 3)
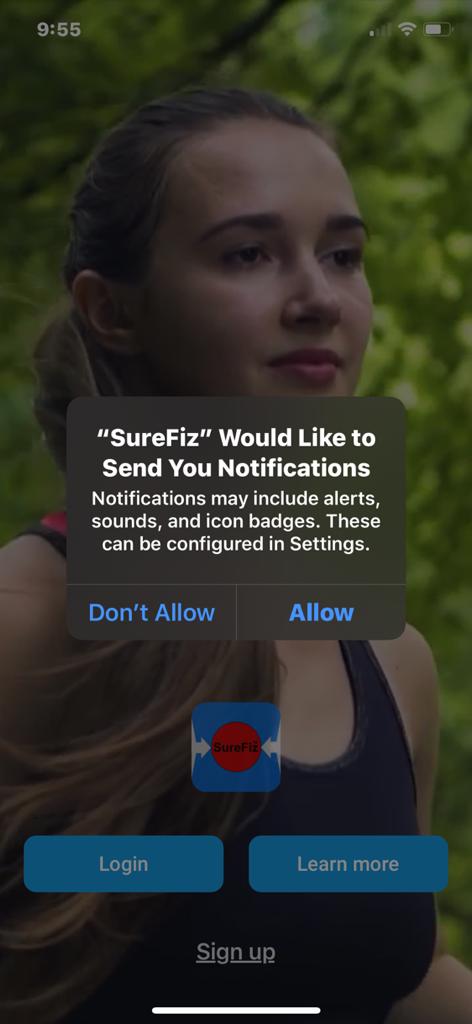
Fig. 1
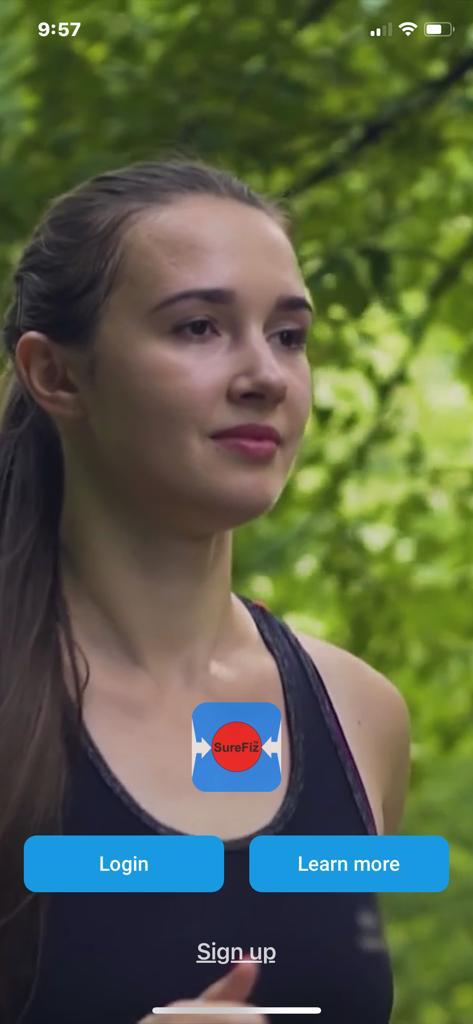
Fig. 2
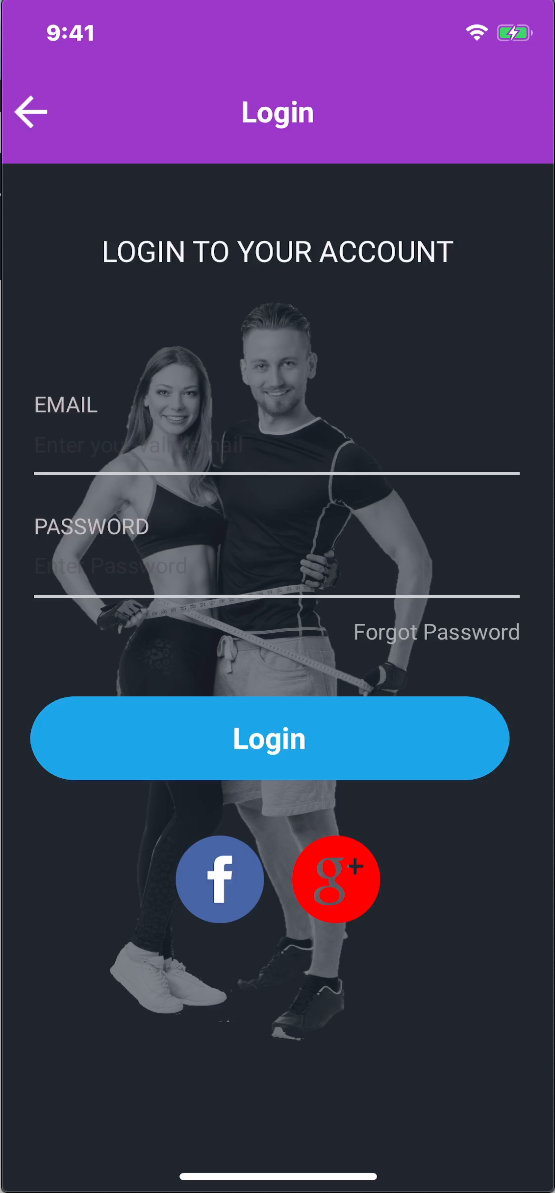
Fig. 3
4. To validate your identity, a one-time password will auto-fill. If due to some connection issue one-time password is not auto filled, you can also find your one-time password in the email we sent you after completing the signup. After the password auto-fills or you have manually entered it, tap on submit. (Fig. 4)
5. After your account is activated successfully, you will see this success message. Tap on ok. (Fig. 5)
6. In this screen you will see all your information you filled during your signup at the SureFiz website. Only two things are missing, your profile picture and the scale ID. Scale ID can be found on the back of the scale. You can either manually enter it, or scan the barcode on the back of the scale using the camera of your phone. To scan the scale ID, tap on, “Tap Here to Scan” (Fig. 6). To allow the camera to scan the barcode, you need to allow the camera to scan. Tap on OK. Scan the bar code as you are taking close picture of the bar code. It will quickly scan. Check the terms and conditions box after reading them. Then Tap on Register.
7. You will see the message that you have registered successfully. Tap on OK. (Fig. 7)
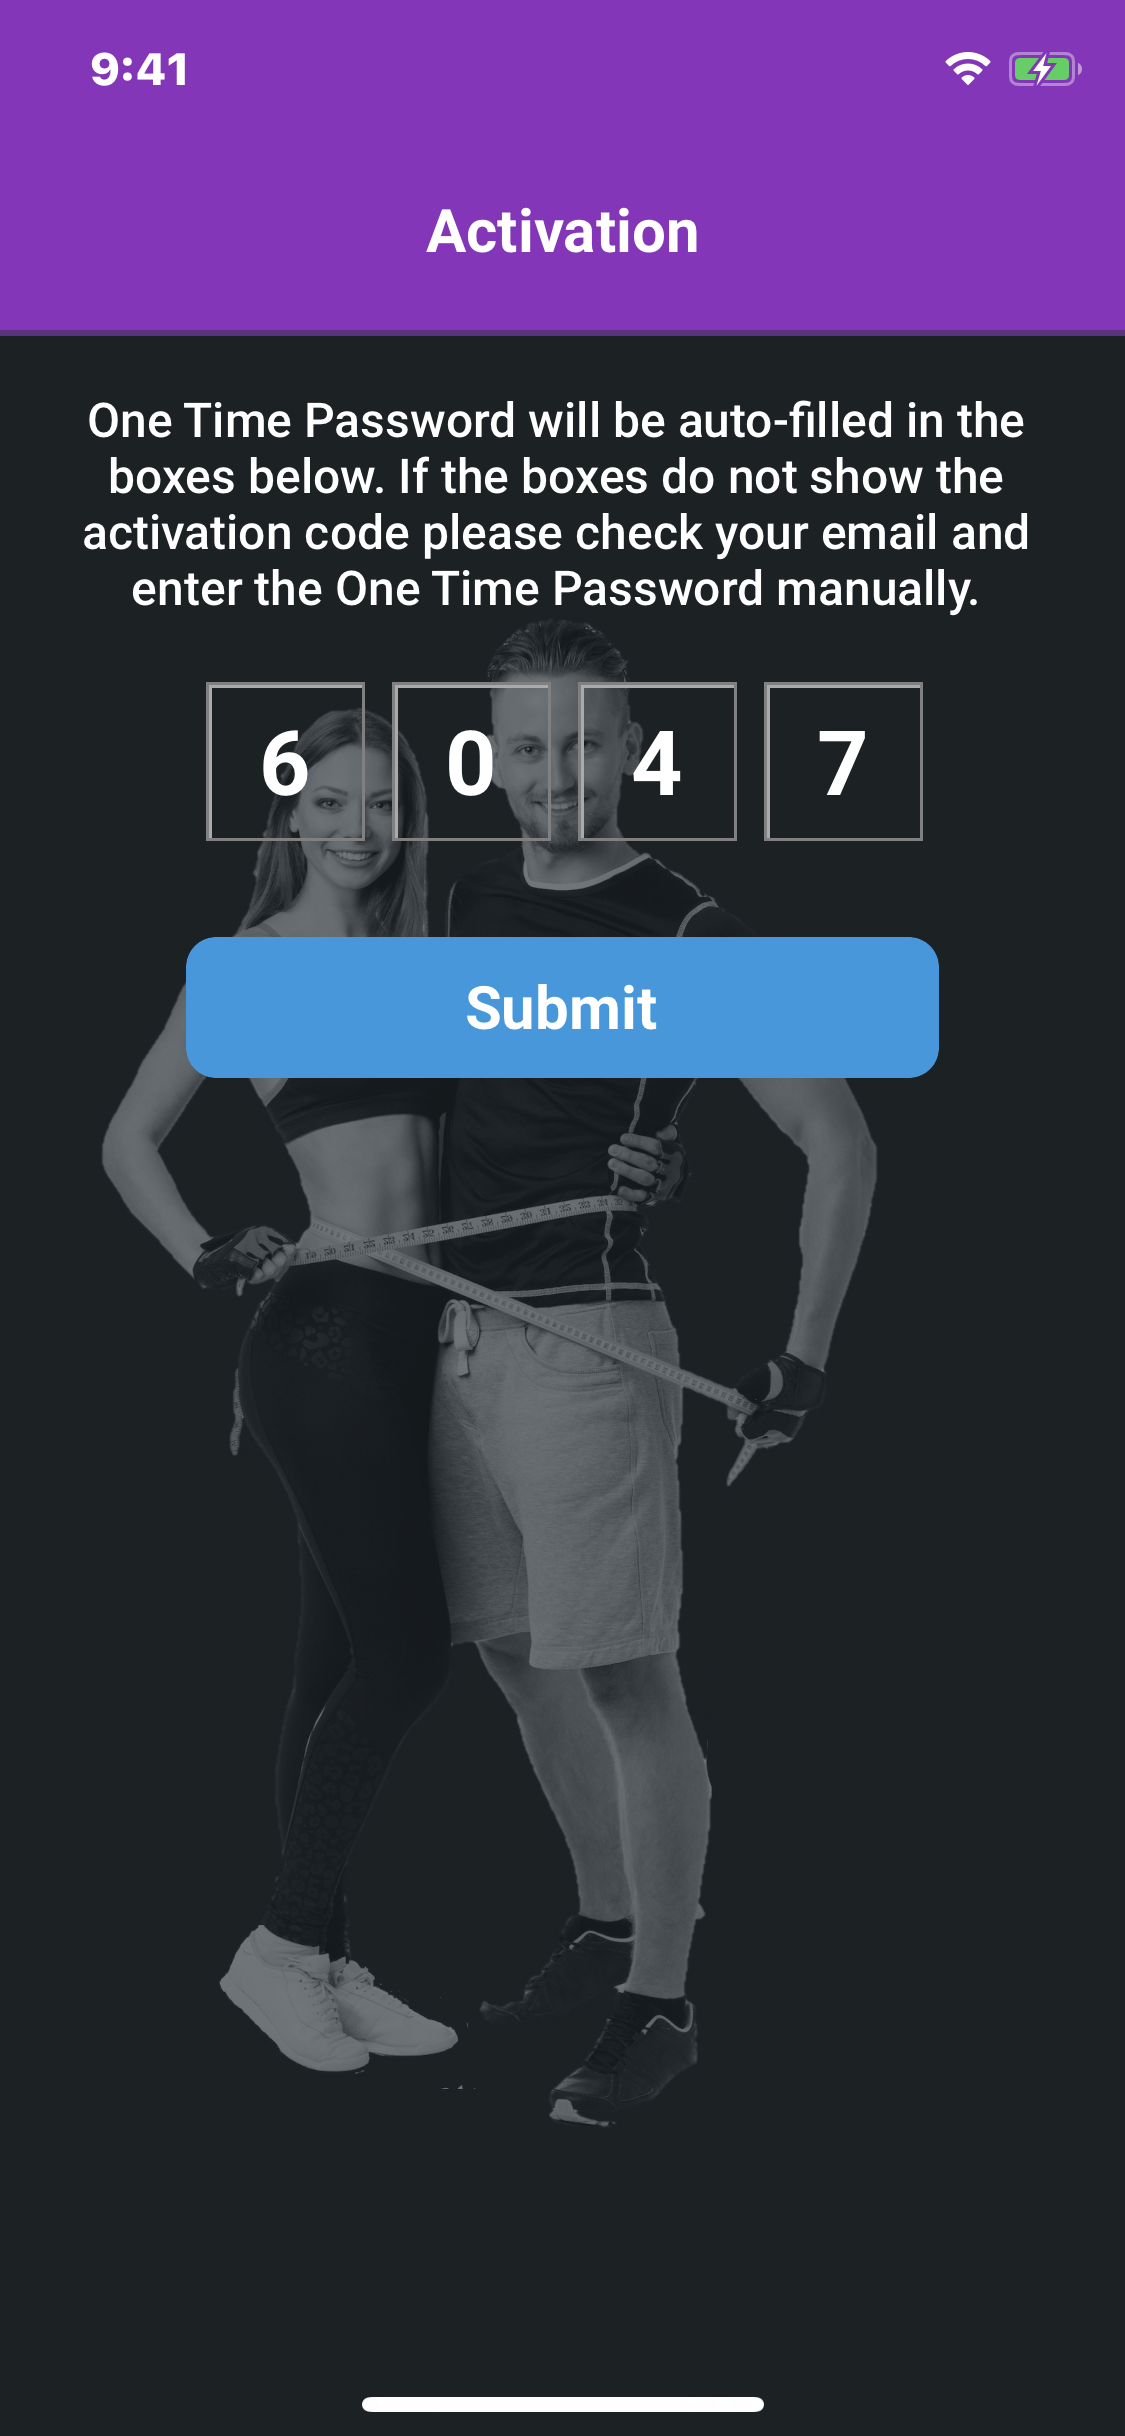
Fig. 4
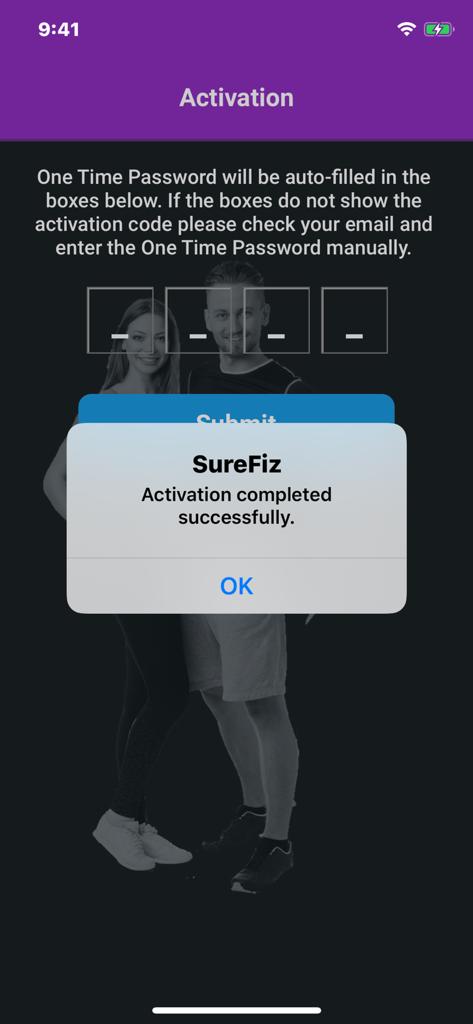
Fig. 5
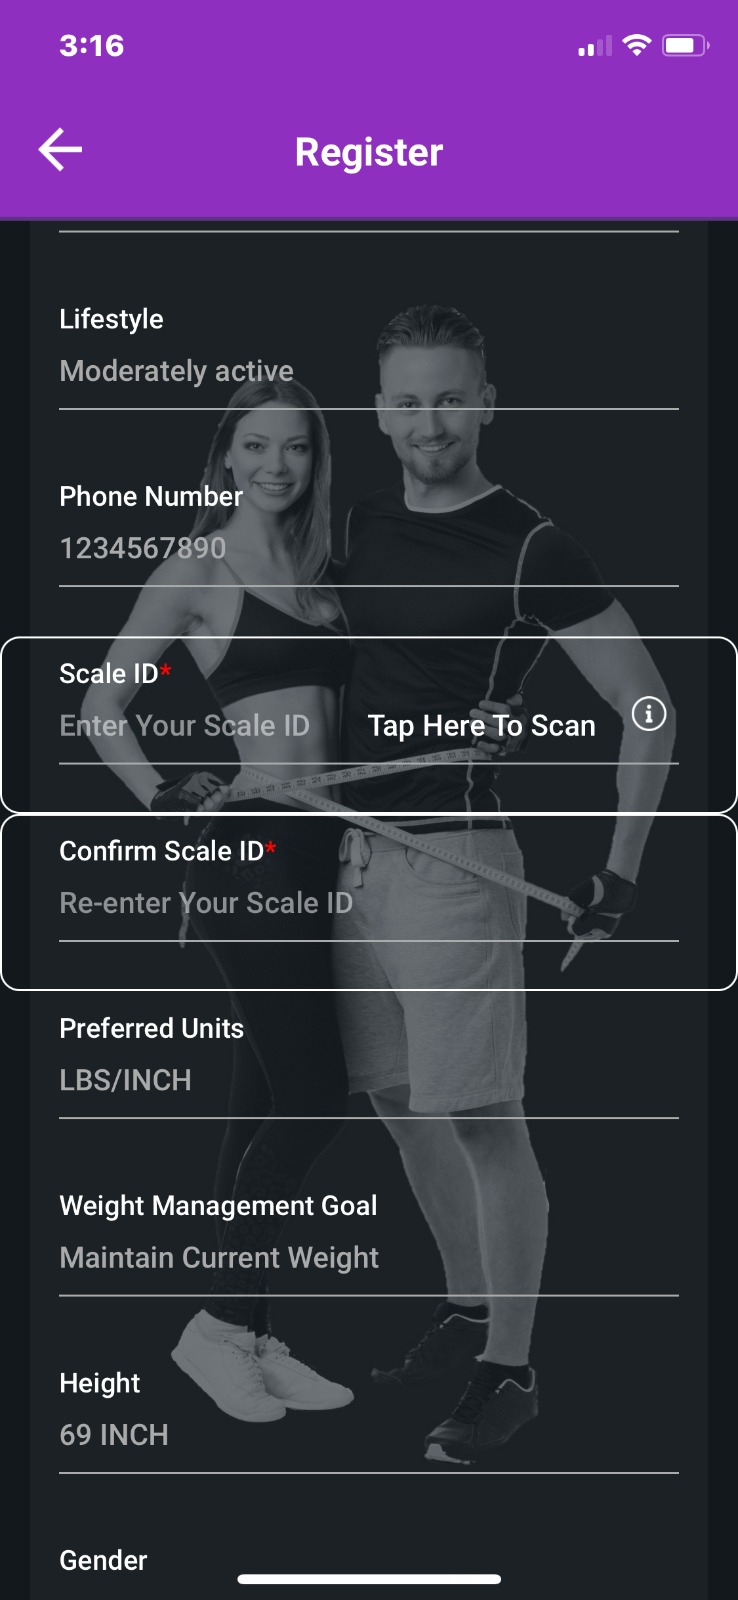
Fig. 6
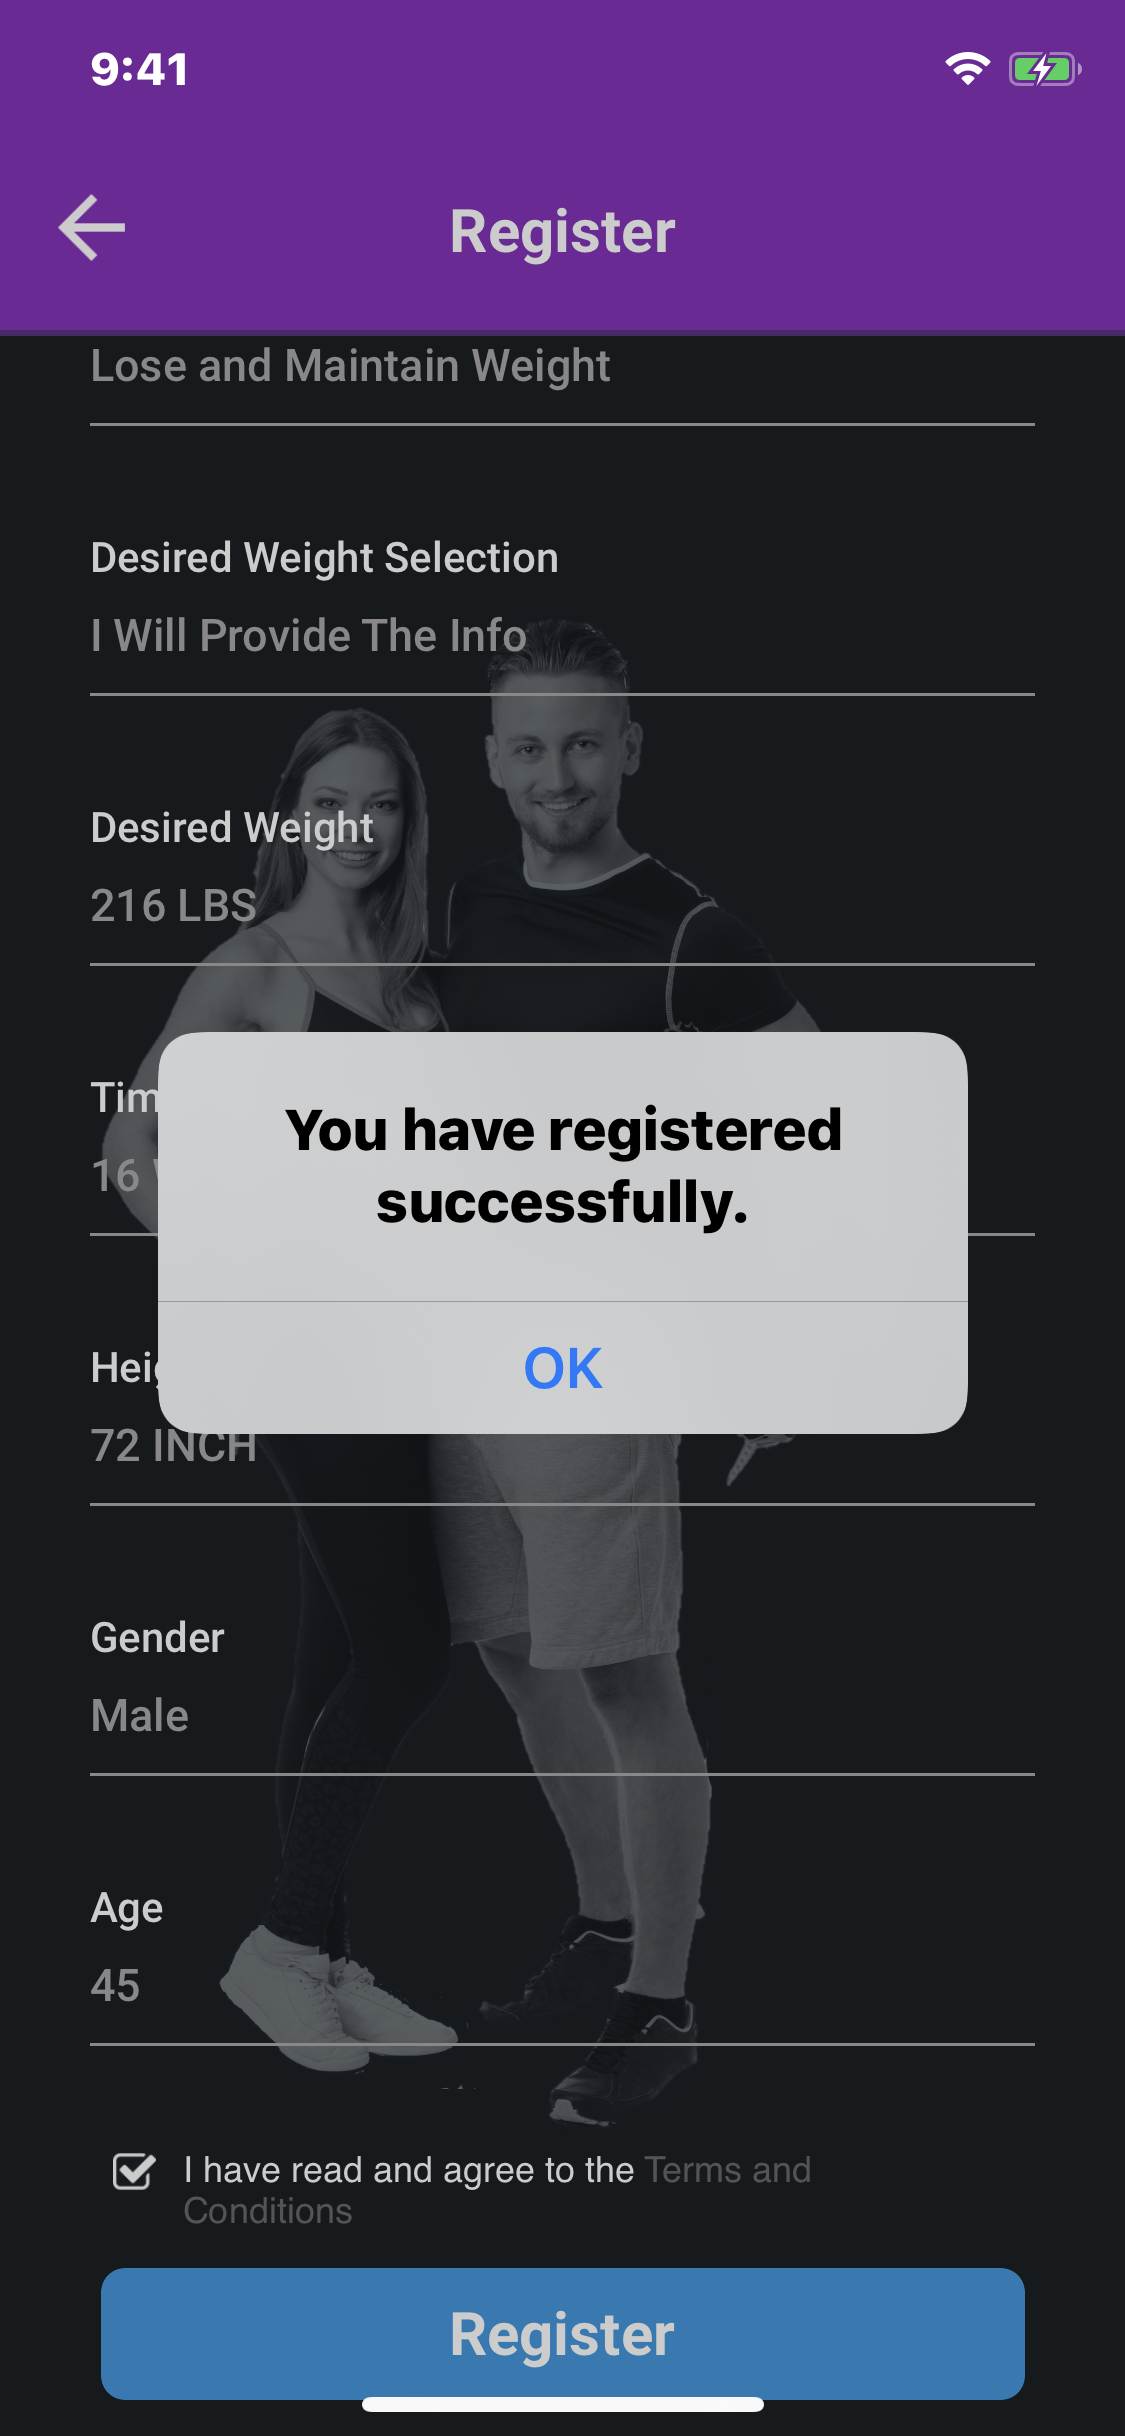
Fig. 7
8.In this section, you prepare to push your WiFi name and password into your scale. Please make sure that your WiFi signal can reach, where you plan to place your SureFiz scale.
Pick the right option for your WiFi: How many WiFi show up in the available WiFi list which belong to you? Generally there are two WiFi, one is 2.4 Giga Hertz and the other is 5 G Hertz. You can check, if you have one WiFi or two WiFi by going to your phone Settings, and tap on WiFi, it will show you a list of available WiFi for you. If there is only one WiFi belonging to you, Go back to your SureFiz WiFi setup screen and choose , “Only One WiFi”. If you see you have two WiFi, choose “Two WiFi”.(Fig. 11)
9. Next, install batteries into the scale. A blinking wi-fi symbol will show up on the scale screen (Fig. 12). If the WiFi symbol on the scale is not blinking, press and hold the black button located in the battery compartment on the back of the scale (Fig. 12A) until you see the flashing WiFi symbol. Please make sure that the WiFi symbol is blinking on the scale screen. (Fig. 12)
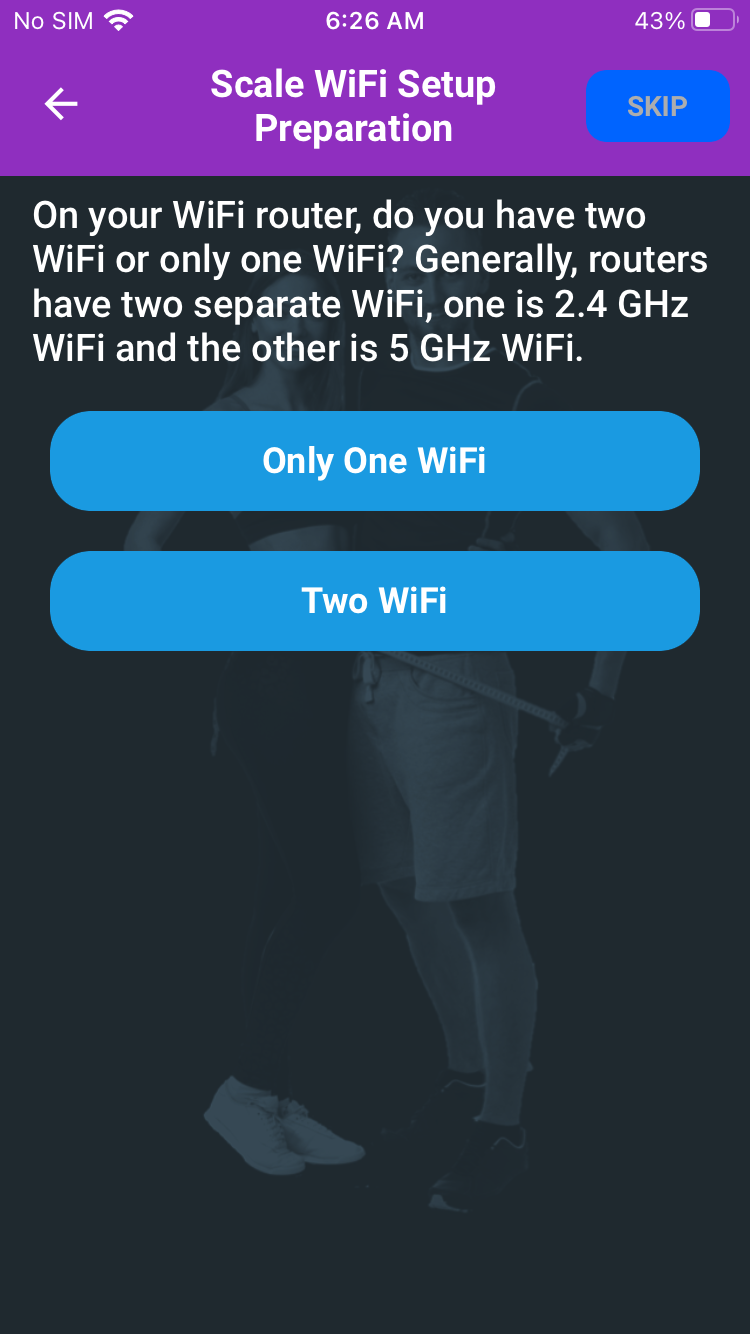
Fig. 11
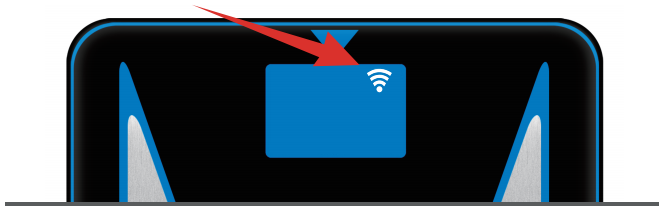
Fig. 12
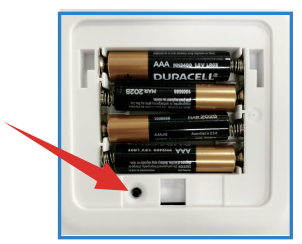
Fig. 12A
10. If you choose “Two WiFi”, Make sure your phone is connected to 2.4 G WiFi. Tap on “Yes, It’s Done” (Fig. 13). Allow “SureFiz” to use your location. It is needed to setup the WiFi. Your WiFi name will be auto filled. Now, enter your WiFi password, please make sure, your password is correct, by tapping on the “Eye” icon next to your entered password. Tap on ‘Configure’ (Fig. 13A). Tap on Ok to allow to access to your scale. If you are using the IOS version 14, click “OK” to connect the devices on your local network for first time in the popup shown (Fig. 15) or else You will see a success message, after the WiFi setup is complete (Fig. 15A). Also, you will see a success ring on the scale screen. (Fig. 15B)
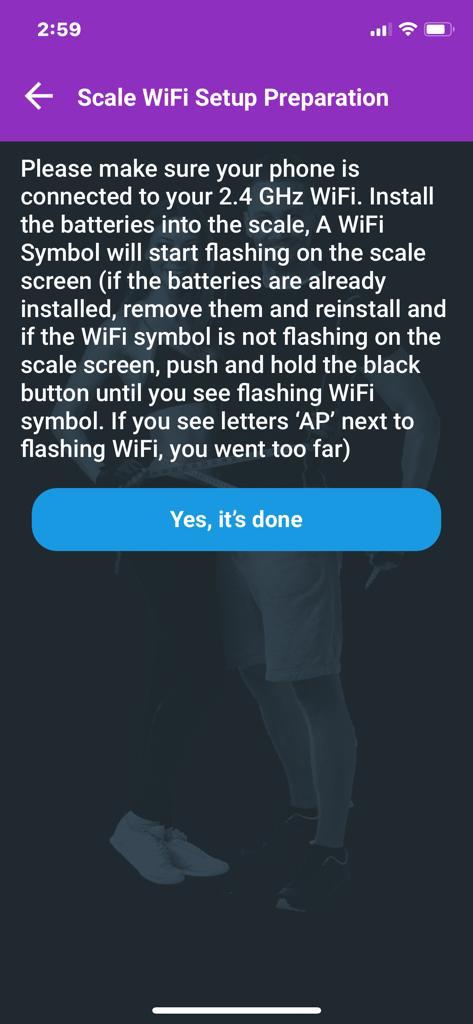
Fig. 13
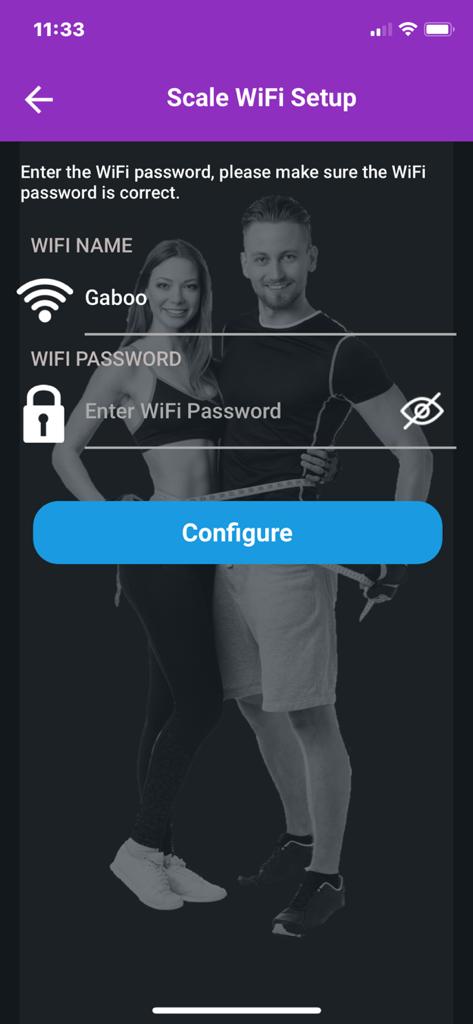
Fig. 13A
11. If you choose “Only One WiFi”. Please takeout the batteries from the battery compartment (if they were already installed), put the batteries in the scale. Press and hold the black button the in the battery compartment until you see letters “AP” next to a WiFi Symbol (Fig. 14). Release the button. Tap on “yes, It’s done”. (Fig. 14A)
Your WiFi name will be auto filled. Now, enter your WiFi password, please make sure, your password is correct, by tapping on the “Eye” icon next to your entered password. Tap on ‘Configure’ (Fig. 14B). There may be some popups messages for you to allow the App connect to your scale (Fig. 14C). Give the permission to proceed. If you are using the IOS version 14, click “OK” to connect the devices on your local network for first time in the popup shown (Fig. 15) or else you will see a success message, after the WiFi setup is complete (Fig. 15A). Also, you will see a success ring on the scale screen. (Fig. 15B)
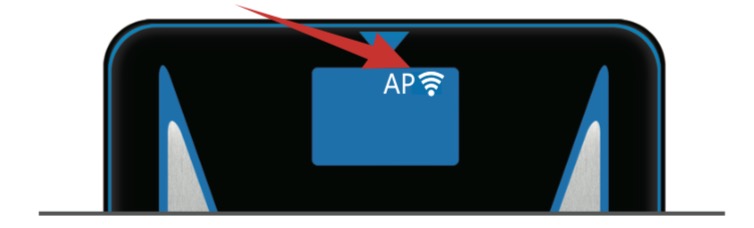
Fig. 14
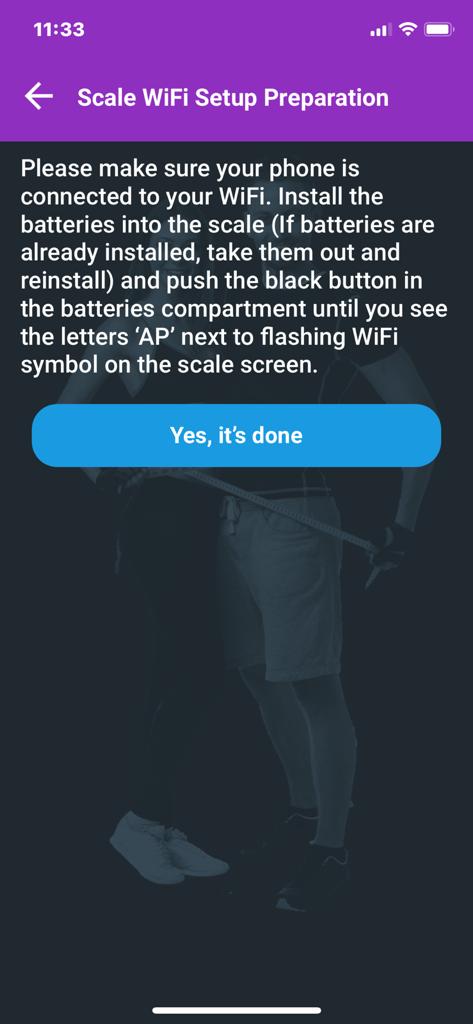
Fig. 14A
Fig. 14B
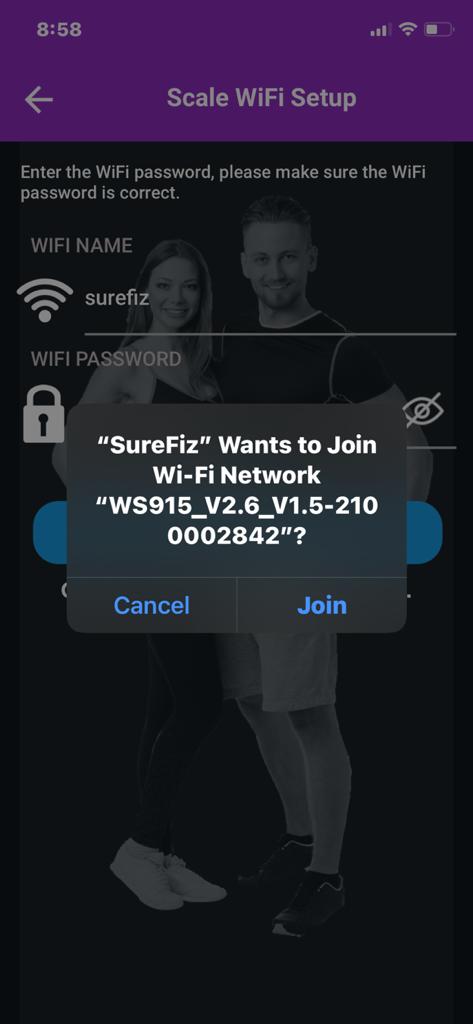
Fig. 14C
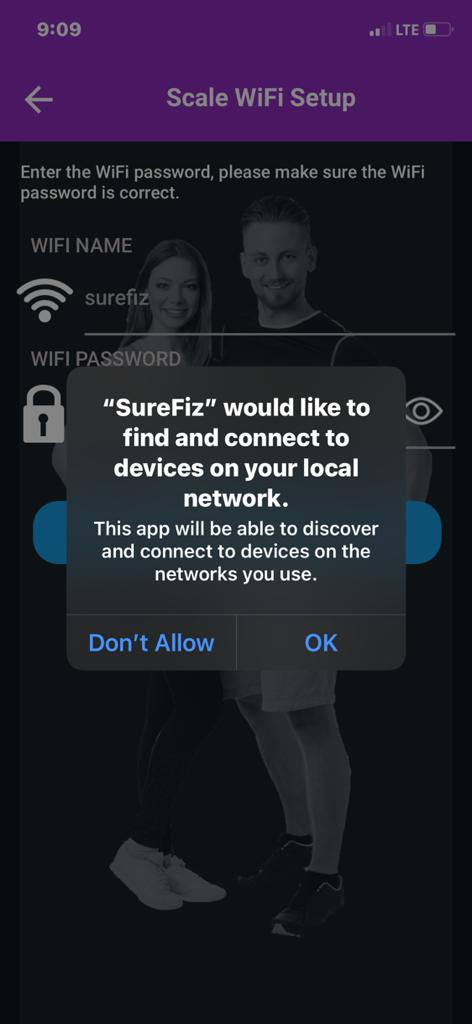
Fig. 15 (From IOS Version 14)
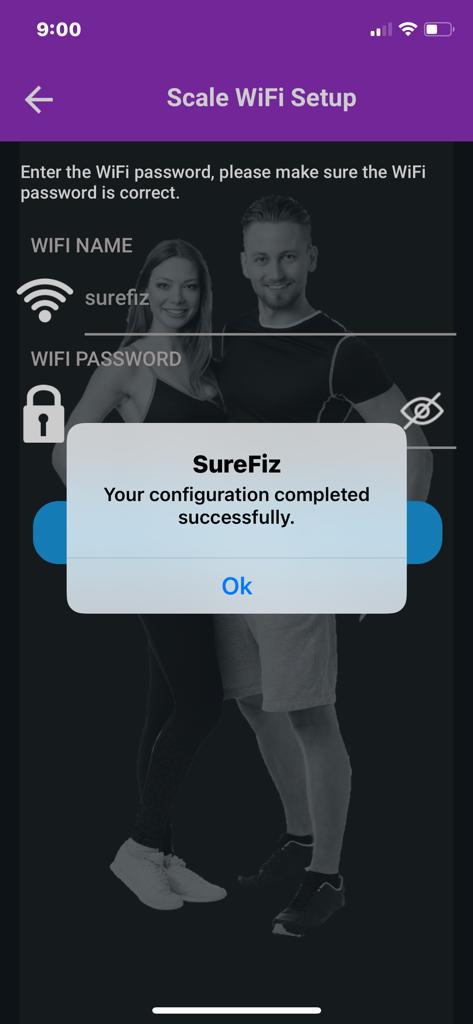
Fig. 15A
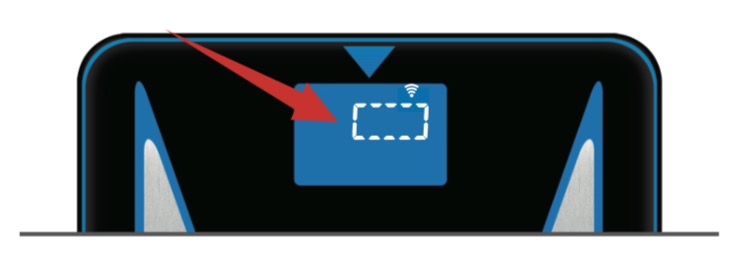
Fig. 15B
Note: Important note for users of newer Android phones running Android version 10. We have added an instruction (Fig. 16) for WiFi set up. It’s super simple just tap on “Configure” (Fig. 14B) to see this instruction. Let’s continue our setup process for rest of the phones makes and models.
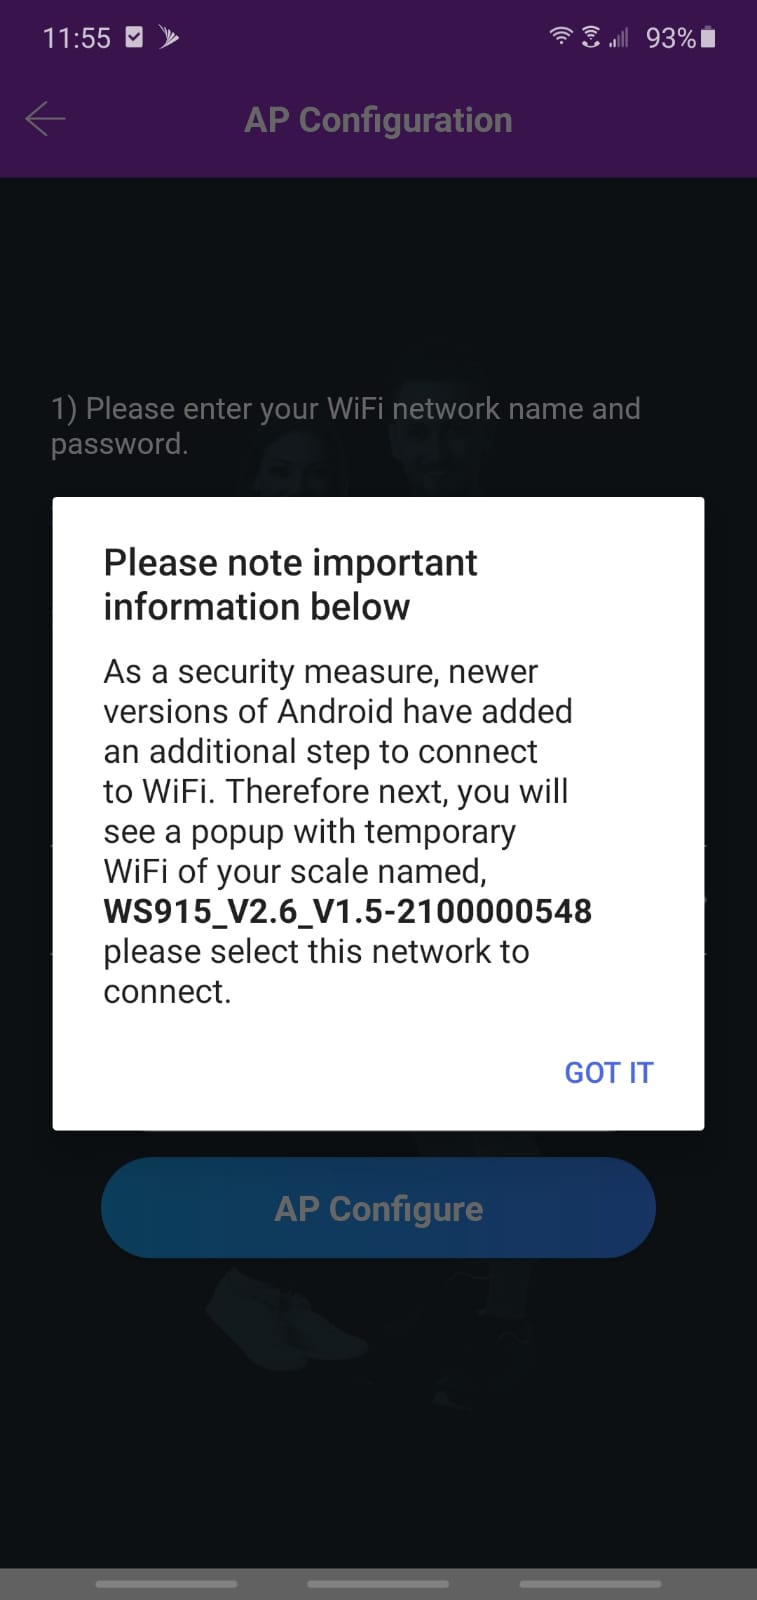
Fig. 16(Android Version 10)
Final Step: That’s it! You’re all set! Welcome to the SureFiz family! Make sure the scale is placed on hard and level surface (not on carpet). With one foot, tap on the scale, you will see 0.0 on the screen, it means, the scale is recalibrated and ready to go. Now, step on the scale barefooted. You have started your SureFiz journey. Welcome aboard. (Fig. 17)
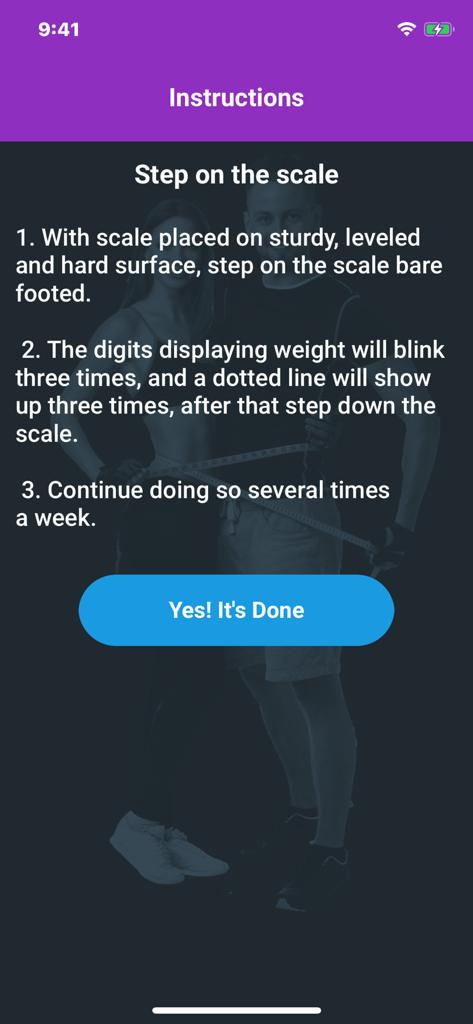
Fig. 17
Troubleshooting
For troubleshooting tips and other setup help please visit https://www.surefiz.com/Support
Rasimo Systems is determined to innovate and disrupt the current technology landscape. With products and services designed for everyday life, we are delivering lifechanging technology to benefit everyone.
Learn More